| MOISTURE MEASUREMENT: QUANTITATIVE EVALUATION
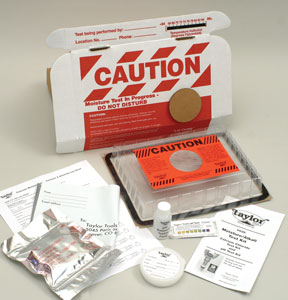
The jar containing the calcium chloride has been pre-weighed, and the weight is indicated on the label. The weight (in grams) of this dish
includes the jar, the lid, and the calcium chloride. If you would like Taylor Tools to do the moisture analysis, be sure to indicate on the label the dates and times the test was started and completed. Fill out the self-addressed label and place the sealed jar containing the calcium chloride in the foil pouch, seal, and then place in the bubble pack return mailer and mail it to the address on the return label.
NOTE: It is absolutely essential that you do not spill any of the calcium chloride as that will invalidate the test results. We will Fax you the results of the test one working day after receipt of the test material. There is no charge for the test results.
The Taylor #626 Moisture Test Kit Gram Scale or #626-MPB, Mini Precision Balance, available from your local distributor, will allow you to conduct the test yourself. Simply weigh the dish (including the lid, and calcium chloride) to the nearest milligram and then determine the moisture content using the following formula. (Note: If you do not have a gram scale, ask your local pharmacist to weigh the sample for you.) Note: Whether you conduct the test yourself or not, the FREE confirmation from Taylor Tools is highly recommended for 3rd party confirmation documentation as well as FREE archival service for a permanent, easily accessible record of your test results.
MOISTURE FORMULA: Click here for Moisture Emission Calculator

Example: Preweighed jar weighed 32.5 grams. It was placed on the floor on 4/3/95 at 4:00 pm and removed on 4/6/95 at 8:00 am (64 hrs.). After resealing the lid to the jar, the sample was weighed and showed a weight of 35.4 grams or a net gain of 2.9 grams.
or, in other words, the moisture emission is 4.93 lbs. over a 1000 sq. ft. area (X Kg. over a 1000 sq. Meter area) in a 24 hour period.
In the above example, if the flooring material to be used is rubber, solid vinyl or wood, the manufacturer would not likely recommend the installation since their upper limit is usually 3.0 lbs. On the other hand, if this were a vinyl composition tile installation, it would probably be acceptable, since vinyl composition tiles can generally be safely installed when the moisture level is 5 lbs. or less. However, you should always consult the manufacturer of the adhesive and floor covering for specific moisture level limits for any particular products to be installed.
NUMBER OF TESTS TO USE:
In areas of 1000 sq. ft. or less you should conduct three tests and add one more for each additional 1000 sq. ft. These tests should be conducted simultaneously and should be placed apart to cover representative areas of the floor (usually one test in the center and others around the perimeter of the room but not closer than five feet from the edge or exterior wall).
A concrete moisture meter (#627) is recommended to determine the placement of the Calcium Chloride test.
LIGHTWEIGHT CONCRETE AND GYPSUM
Do not use the #625 Moisture Test Kit for lightweight concrete and/or gypsum floors. Refer to ASTM F2471 (“Standard Practice for Installation of Thick Poured Lightweight Cellular Concrete Underlayments and Preparation of the Surface to Receive Resilient Flooring”) for testing information regarding the use of a surface moisture meter. Consult the manufacturer of the concrete and materials being installed for specific methods and values required for installation.
Refer to ASTM F-710, (“Standard Practice for Preparing Concrete Floor to Receive Resilient Flooring”) for further information.
Note: For a copy of ASTM F-710, F-2471 or F-1869 visit: www.astm.org
pH Test Procedure |
| 1. Clean floor to remove all oil, dirt, dust and any floor coating or sealer. If the surface has a primer, sealer or old adhesive that might affect the test procedure, it must be removed by lightly grinding, sanding or bead blasting. Do not remove more than 1/16" of concrete. Remember, since alkali is present in cement, removal of more than 1/16" may give a high pH reading. This test is designed to test the surface that will come in contact with the adhesive. |
 Optional PH100 pH meter Optional PH100 pH meter
|
Acceptable pH Levels
Concrete flooring with a surface alkali content of pH 9 or higher must be corrected, according to the Carpet and Rug Institute and the Canadian Carpet Institute.
Two (2) pH alkalinity tests should be performed for each moisture test procedure. If the pH level is 9 or higher, it may be reduced by mopping the floor with a 10% muriatic acid solution. Allow the acid wash to dry, then mop with tap water. Repeat the procedure twice, then test again. Typically, the higher the calcium chloride test results are, the higher the pH factor will be. Always consult the adhesive manufacturer for the acceptable pH range. |